Si SpamExperts filtra SPAM después de verificar el correo electrónico recibido, determina que posiblemente sea un correo no deseado, dicho correo electrónico se agrega para filtrar la cuarentena. Dicho correo electrónico no llega al buzón. La cuarentena del filtro de spam se puede administrar a través del panel de administración de filtros.

En la ventana de administración de filtros de cuarentena, se pueden seleccionar correos electrónicos específicos como no spam y enviarlos al buzón. En la misma ventana también se puede determinar qué debe hacer el filtro en el futuro si recibe este tipo de correo electrónico.

Para que administrar la cuarentena del filtro SPAM de SpamExperts siga estos pasos:

1. Inicie sesión en la gestión del filtro SPAM de SpamExperts a través del área de clientes:

¿Cómo conectarse al filtro de spam SpamExperts?

2. Pulsa sobre el apartado “Spam quarantine”:


3. View the list of quarantined emails:


Once you have found the email you are interested in, which should not be quarantined, select it on the left side and you will see additional options in the section “Apply to selected” – here you can choose what to do with the email:

The most relevant actions that can be performed with quarantined emails:
- Remove from quarantine – remove email from quarantine (the email will not be delivered to the recipient);
- Release from quarantine – deliver the email to the recipient;
- Release and train from quarantine – deliver the email to the recipient and indicate to the filter that this type of emails should not be quarantined in the future.
So that whitelist/blacklist sender or recipient select it and press on reverse triangle:

- Whitelist sender – whitelist the sender so that in the future all emails sent by this sender will not be filtered and automatically delivered to the inbox;
- Blacklist sender – blacklist a sender so that in the future all emails sent by this sender will be rejected and will not reach the recipient.
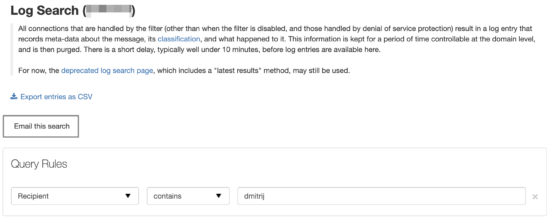
4. Logs downloading:
All needed logs can be sent to your email. For that press on “Email this Search”:
After that you will see the second window:
Subject – you can specify the needed subject of the message;
Delivery – select when the email with logs will be sent;
Sender – the sender which will be indicated upon receipt of the letter;
Recipient – email address where email should be sent;
Template name – the layout of statements:
- row – each log is sent separately;
- columns – logs are sent in one table.
After all, sections are filled, select the “Schedule” so that an email to be sent.
